Fractal flames and Where to Find Them
Abdullah Barhoum - 05/2025
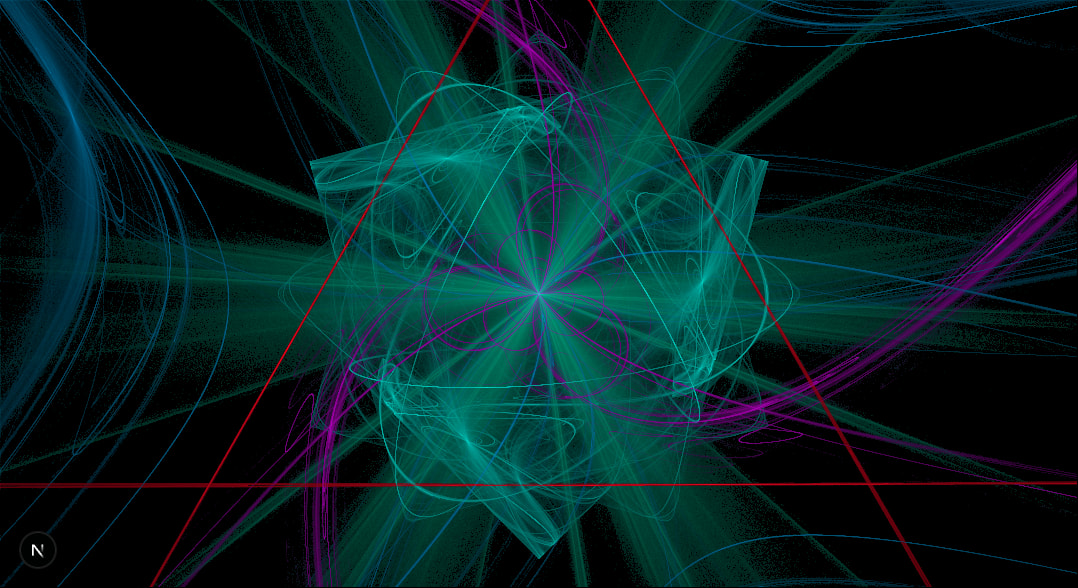
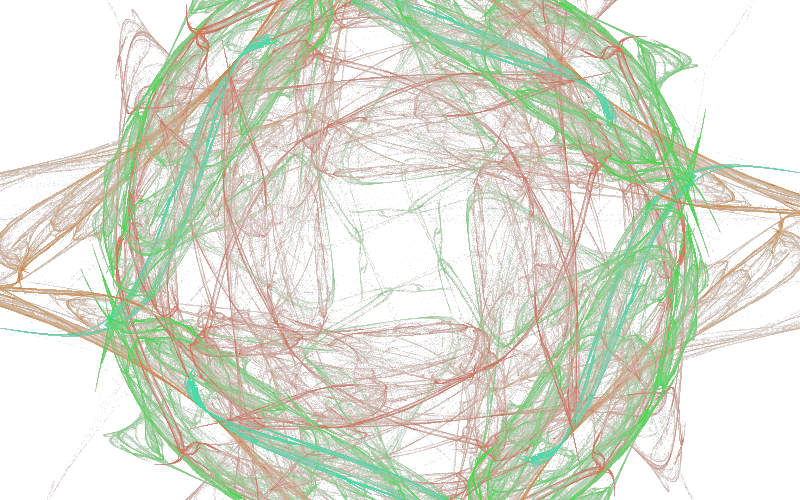
Fractal flames have been on my todo list for many years now, and I finally got the time to dig deeper and get to know this fascinating piece of mathematics and art. And you can experience it too! Click on the image below to get started, every time you click or tap you will get a new fractal.

I will talk about how to compute fractal flames, how to render them, and finally how to do this in real time. This post builds heavily on the original paper The Fractal Flame Algorithm by Scott Draves, which is a fascinatingly interesting while also being easy to read paper. And the absolutely intricate book Digital Video and HDTV: Algorithms and Interfaces, Second Edition by Charles Poynton, which covers most concepts related to color and human perception in much more details.
EDIT 02/2026:
Since I first wrote this blogpost, I have added many more features like different color sampling, variations, morphing between flames, WebGPU compute, and others. If I get the time and energy soon I will write a follow up.
Equations that Ignite
In the core of these flames is what is called an Iterated Function System (IFS), which sounds scary, but is actually just a bunch of functions. For our flames, we will only consider functions from to , since we will be working in 2D.
To create a fractal with these functions, we iteratively play the Chaos Game, a form of Monte Carlo Simulation:
- Start with a random point
- Randomly choose a function from IFS
- Apply this random function to your point to get a new point
- Mark this new point on the screen
- Go to step 2
One such IFS, The Sierpiński triangle, can be defined with 3 functions
If you run the above algorithm on these functions, you will get the following

Cool right? well this is only the start.
Here is the source code if you want to play around with it, just copy paste into an html file.
The code examples in this blog post will be scrappy, my goal is to give you a rough intuition on what you need to do if you were to implement this your self, in JS or any other language. I intentionally disregard "best practices" for the sake of brevity and clarity.
<!doctype html>
<canvas id="canvas" width="800" height="800" style="background: black"></canvas>
<script>
  const ctx = canvas.getContext('2d'),
    w = canvas.width,
    h = canvas.height;
  ctx.fillStyle = 'white';
  const ifs = [([x, y]) => [x / 2, y / 2], ([x, y]) => [(x + 1) / 2, y / 2], ([x, y]) => [x / 2, (y + 1) / 2]];
  // start with a random point
  let [x, y] = [Math.random(), Math.random()];
  // chaos game!
  for (let i = 0; i < 50000; i++) {
    [x, y] = ifs[Math.floor(Math.random() * ifs.length)]([x, y]);
    ctx.fillRect(x * w, y * h, 1, 1);
  }
</script>
Thinking in Matrices
The functions in the previous example are Affine, which in a broad definition are a composition of scaling, rotation, shear, and translation. You can easily represent this in a 3x3 Matrix
where are the linear transformation factors, and are the translation. I will leave it as an exercise to you to figure out what the matrix representation of the Sierpiński IFS would be.
The final row is always in affine transformations, if these values are different, we would have a Projective Transform (or a Homography), which are very common in 3D rendering, but this is a topic for a different day.
Applying the transformation to a point is a simple vector matrix multiplication.
It is helpful to reframe the problem from "functions with inputs and outputs" to "matrix multiplication" because you now have all of the robustness and rigorousness of mathematics in your hands.
Generating flames
Well, now we know our problem is just vector matrix multiplication, and we know we start with a random point, then the only missing piece is the matrices!
const ifs = Array.from({ length: 3 }, () => {
  const values = Array.from({ length: 6 }, Math.random);
  return new Matrix3(...values, 0, 0, 1);
});
In this example we generate 3 random functions, but there is absolutely nothing stopping you from generating 20, or 1000.

Full source code
I will be using three.js from now onwards just to reduce the boilerplate. But the idea is still the same. Maybe you get a black image if you run this code, that is okay because of randomness, we will fix this soon, for now just refresh the page.
<!doctype html>
<canvas id="canvas" width="800" height="500" style="background: black"></canvas>
<script type="module">
  import { Vector2, Matrix3 } from 'https://cdn.jsdelivr.net/npm/three@0.176.0/+esm';

  const ctx = canvas.getContext('2d'),
    w = canvas.width,
    h = canvas.height;
  ctx.fillStyle = 'white';

  // generate IFS randomly
  const ifs = Array.from({ length: 3 }, () => {
    const values = Array.from({ length: 6 }, Math.random);
    return new Matrix3(...values, 0, 0, 1);
  });

  const point = new Vector2(Math.random(), Math.random());
  for (let i = 0; i < 50000; i++) {
    const { x, y } = point.applyMatrix3(ifs[Math.floor(Math.random() * 3)]);
    // we scale by 10 just to make sure it fits in the screen
    ctx.fillRect((x / 10) * w, (y / 10) * h, 1, 1);
  }
</script>
As an addendum to the mathematical jargon, the original paper recommends that our generated transformations are contractive, which means they bring points closer together, usually close to a fixed point. In technical terms, to create a contractive function, the following constrains should be met:
When creating our IFS, Math.random only gives us values in the range, but because of all of the squaring, we can also go negative.
function random1Minus1() {
  return Math.random() * 2 - 1; // in [-1, 1)
}

function generateMatrix() {
  let a, b, d, e;
  do {
    [a, b, d, e] = Array.from({ length: 4 }, random1Minus1);
  } while (
    a ** 2 + d ** 2 >= 1 ||
    b ** 2 + e ** 2 >= 1 ||
    a ** 2 + b ** 2 + d ** 2 + e ** 2 >= 1 + (a * e - b * d) ** 2
  );
  const [c, f] = Array.from({ length: 2 }, random1Minus1);
  return new Matrix3(a, b, c, d, e, f, 0, 0, 1);
}
Note that even though these functions are contractive, and we generating values in the [-1, 1] range, this does not mean that the all transformed points will be inside the range (although many are), it is only a guarantee that they don't explode to infinity. Since we are randomly choosing random functions (not a typo), you cannot predict the behavior of the system with 100% confidence.
Another note is that we are doing this to ensure mathematical correctness, but nothing should stand in the way of your creativity! especially not math. You can stick to the original implementation, or any other one for that matter, if you are happy with the results.
Thinking in UV
Ok, now we have a bunch of random points between [-1, 1], how can we get this to a screen?
Well, we can adapt the process UV mapping from the world of 3D rendering to our 2D case. Technically we are doing reverse UV mapping, but I'll let it slide for now. To define the mapping for our flame, we add a couple of reasonable constraints:
- the point [0, 0] should be in the center of the screen
- Values around 1 / -1 should match the edges of the screen
The later is is technically only possible if you have a square screen 🤔 of if you stretch the image, which looks ugly.
To preserve the aspect ratio, we can map our [-1, 1] range to the shortest screen side to "contain" the image with black areas on the sides, or to the longest screen side to "cover" the screen with cropping a part of the image.
Here is a visual comparison of these different modes
I did not come up with these names, these are the values of the CSS object-fit property. I personally prefer the contain mode, but you can choose what you like.
The implementation is as follows:
const resolution = new Vector2(width, height);

let ratio: Vector2;
if (mode === 'fill') ratio = new Vector2(1, 1);
else if (mode === 'contain') ratio = resolution.clone().divideScalar(Math.min(width, height));
else if (mode === 'cover') ratio = resolution.clone().divideScalar(Math.max(width, height));

function reverseUV(point: Vector2) {
  return point.divide(ratio).addScalar(1).multiplyScalar(0.5).multiply(resolution).round();
}
The above code is a bit more convoluted, because it is also handling for the case when you have a vertical screen (i.e. smartphone), but the concept is similar, also, the only difference between contain and cover is the min / max.

Now we are talking!
Full code example
<!doctype html>
<canvas id="canvas" width="800" height="500" style="background: black"></canvas>
<script type="module">
  import { Vector2, Matrix3 } from 'https://cdn.jsdelivr.net/npm/three@0.176.0/+esm';

  const ctx = canvas.getContext('2d');
  ctx.fillStyle = 'white';

  const resolution = new Vector2(canvas.width, canvas.height);

  let ratio,
    mode = 'contain';
  if (mode === 'fill') ratio = new Vector2(1, 1);
  else if (mode === 'contain') ratio = resolution.clone().divideScalar(Math.min(canvas.width, canvas.height));
  else if (mode === 'cover') ratio = resolution.clone().divideScalar(Math.max(canvas.width, canvas.height));
  const ifs = Array.from({ length: 3 }, generateMatrix);
  const point = new Vector2(Math.random(), Math.random());
  for (let i = 0; i < 500000; i++) {
    point.applyMatrix3(ifs[Math.floor(Math.random() * 3)]);
    const { x, y } = reverseUV(point.clone());
    ctx.fillRect(x, y, 1, 1);
  }

  function random1Minus1() {
    return Math.random() * 2 - 1;
  }

  function generateMatrix() {
    let a, b, d, e;
    do {
      [a, b, d, e] = Array.from({ length: 4 }, random1Minus1);
    } while (
      a ** 2 + d ** 2 >= 1 ||
      b ** 2 + e ** 2 >= 1 ||
      a ** 2 + b ** 2 + d ** 2 + e ** 2 >= 1 + (a * e - b * d) ** 2
    );
    const [c, f] = Array.from({ length: 2 }, random1Minus1);
    return new Matrix3(a, b, c, d, e, f, 0, 0, 1);
  }

  function reverseUV(point) {
    return point.divide(ratio).addScalar(1).multiplyScalar(0.5).multiply(resolution).round();
  }
</script>
Taming Randomness
Working with random numbers is nice, because you get surprising results! but it is also not nice, because you get surprising results. Using Math.random is maybe fine for a small snippet, but it makes debugging bigger projects harder, because it lacks reproducibility.
Pseudorandom number generators (PRNGs), which generate repeatable predictable random numbers, are the solution we are looking for. Given a starting condition, usually specified by a seed, you can always produce the same sequence of numbers.
Procedural Generation, like Minecraft worlds, and Machine Learning Models rely heavily on PRNGs for reproducibility. For my projects I use seedrandom with the Xorshift 128 Algorithm (which is the same algorithm used in V8 for Math.random, but not seed-able by developers.)
import { xor128 } from 'seedrandom';
const rand = xor128('hello!');
rand(); // 0.3467337724287063
I generate a new seed for every visit using Math.random, but then this seed is used to generate the data for the flames. If ever find something I like, or an issue I need to debug, I can just re-use the seed.
The seed itself is 4 character case sensitive alpha numeric string that I embed in the URL of the page. Something like seed=h7s3, but it could be anything with any length, you can even put your name in the seed and you would have your own flame! Here is mine.
Variations
So far we have been considering linear IFS, which mostly generate lines. It is time to make this more interesting. Variations are another set of functions, also in the to domain, with the twist of being highly non-linear. An example would be:
function sinusoidal(point: Vector2) {
  point.x = Math.sin(point.x);
  point.y = Math.sin(point.y);
}
Variations are applied directly after applying the affine transformation but before drawing to the screen. Usually you generate your affine transforms, and for each of them you choose a variation randomly. For the sake of demonstration, here is an example flame with the above variation:
We can add more variations to this:
function hyperbolic(point: Vector2) {
  const r = point.length();
  const t = Math.atan2(point.x, point.y);
  point.set(Math.sin(t) / r, r * Math.cos(t));
}
function eyefish(point: Vector2) {
  point.multiplyScalar(2 / (point.length() + 1));
}
Source code for the figures above
<!doctype html>
<canvas id="canvas" width="800" height="500" style="background: black"></canvas>
<script src="https://cdnjs.cloudflare.com/ajax/libs/seedrandom/3.0.5/seedrandom.min.js"></script>
<script type="module">
  import { Vector2, Matrix3 } from 'https://cdn.jsdelivr.net/npm/three@0.176.0/+esm';

const rand = new Math.seedrandom('hello!');

const ctx = canvas.getContext('2d');
ctx.fillStyle = 'white';

const variations = [
function sinusoidal(point) {
point.x = Math.sin(point.x);
point.y = Math.sin(point.y);
},
function hyperbolic(point) {
const r = point.length();
const t = Math.atan2(point.x, point.y);
point.set(Math.sin(t) / r, r * Math.cos(t));
},
function eyefish(point) {
point.multiplyScalar(2 / (point.length() + 1));
},
];

const resolution = new Vector2(canvas.width, canvas.height);

let ratio,
mode = 'contain';
if (mode === 'fill') ratio = new Vector2(1, 1);
else if (mode === 'contain') ratio = resolution.clone().divideScalar(Math.min(canvas.width, canvas.height));
else if (mode === 'cover') ratio = resolution.clone().divideScalar(Math.max(canvas.width, canvas.height));

const ifs = Array.from({ length: 5 }, generateMatrix);
const vars = Array.from({ length: ifs.length }, () => variations[Math.floor(rand() * variations.length)]);

const point = new Vector2(Math.random(), Math.random());
for (let i = 0; i < 500000; i++) {
const idx = Math.floor(Math.random() \* ifs.length);
point.applyMatrix3(ifs[idx]);
// If you want the image without variations, just comment out this line:
vars[idx](point);
const { x, y } = reverseUV(point.clone());
ctx.fillRect(x, y, 1, 1);
}

function random1Minus1() {
return rand() \* 2 - 1;
}

function generateMatrix() {
let a, b, d, e;
do {
[a, b, d, e] = Array.from({ length: 4 }, random1Minus1);
} while (
a ** 2 + d ** 2 >= 1 ||
b ** 2 + e ** 2 >= 1 ||
a ** 2 + b ** 2 + d ** 2 + e ** 2 >= 1 + (a _ e - b _ d) \*\* 2
);
const [c, f] = Array.from({ length: 2 }, random1Minus1);
return new Matrix3(a, b, c, d, e, f, 0, 0, 1);
}

function reverseUV(point) {
return point.divide(ratio).addScalar(1).multiplyScalar(0.5).multiply(resolution).round();
}

</script>
The original paper has more than 40 different variations found in Appendix A, I highly recommend that you give it a look. I experimented with choosing a random variation in every iteration, this however was not visually appealing since pixels would spread uniformly across the entire image, acting mostly as noise. This is more prominent the more variations you have.
Adding Symmetries
Before I start I just want to say that I love symmetries so fucking much.
Mirroring
One simple kind of symmetry is mirroring, which you can easily model as a variation:
function mirrorAcrossX(point: Vector2) {
  point.y *= -1;
}

function mirrorAcrossY(point: Vector2) {
  point.x *= -1;
}
You can add symmetries to your variations, however the effect won't be as prominent, since it will only be applied 1 out of times, where is the number of IFS you are using. You would need to replace half of the variations with symmetries so they show up with 50% probability.
Another, much simpler approach, is to always apply symmetries independently after affine transforms and variations. Don't forget to include the original point (i.e. the identity) without any mirroring in the output, otherwise you lose the mirroring.


With a higher degree of symmetry, the image gets brighter, because we are coloring multiple pixels per iteration of the chaos game.
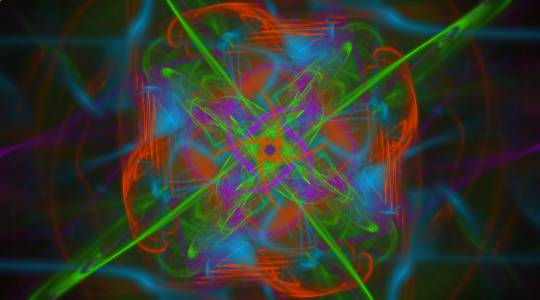
Rotational Symmetry
Going into formalities a bit, a rotational symmetry of order means rotations by an angle of radians. To achieve this visual effect, we would need to rotate our point times by that angle.
function createRotationalSymmetries(n: number) {
  const mat = new Matrix3().makeRotation((Math.PI * 2) / n);
  const rotate = point => point.applyMatrix3(mat);
  return Array.from({ length: n }).fill(rotate);
}
And we can let it run!
Source code for the figures above
<!doctype html>
<canvas id="canvas" width="800" height="500" style="background: black"></canvas>
<script src="https://cdnjs.cloudflare.com/ajax/libs/seedrandom/3.0.5/seedrandom.min.js"></script>
<script type="module">
  import { Vector2, Matrix3 } from 'https://cdn.jsdelivr.net/npm/three@0.176.0/+esm';

  const rand = new Math.seedrandom('hello!');

  const ctx = canvas.getContext('2d');
  ctx.fillStyle = 'white';

  const variations = [
    function sinusoidal(point) {
      point.x = Math.sin(point.x);
      point.y = Math.sin(point.y);
    },
    function hyperbolic(point) {
      const r = point.length();
      const t = Math.atan2(point.x, point.y);
      point.set(Math.sin(t) / r, r * Math.cos(t));
    },
    function eyefish(point) {
      point.multiplyScalar(2 / (point.length() + 1));
    },
  ];

  const resolution = new Vector2(canvas.width, canvas.height);

  let ratio,
    mode = 'contain';
  if (mode === 'fill') ratio = new Vector2(1, 1);
  else if (mode === 'contain') ratio = resolution.clone().divideScalar(Math.min(canvas.width, canvas.height));
  else if (mode === 'cover') ratio = resolution.clone().divideScalar(Math.max(canvas.width, canvas.height));

  const ifs = Array.from({ length: 5 }, generateMatrix);
  const vars = Array.from({ length: ifs.length }, () => variations[Math.floor(rand() * variations.length)]);
  const symmetries = [
    v => {}, // identity
    // mirrorAcrossX,
    // mirrorAcrossY,
    // mirrorAcrossX,
    ...createRotationalSymmetries(4),
  ];
  const point = new Vector2(Math.random(), Math.random());
  for (let i = 0; i < 500000; i++) {
    const idx = Math.floor(Math.random() * ifs.length);
    point.applyMatrix3(ifs[idx]);
    vars[idx](point);
    for (const symmetry of symmetries) {
      symmetry(point);
      const { x, y } = reverseUV(point.clone());
      ctx.fillRect(x, y, 1, 1);
    }
  }

  function random1Minus1() {
    return rand() * 2 - 1;
  }

  function generateMatrix() {
    let a, b, d, e;
    do {
      [a, b, d, e] = Array.from({ length: 4 }, random1Minus1);
    } while (
      a ** 2 + d ** 2 >= 1 ||
      b ** 2 + e ** 2 >= 1 ||
      a ** 2 + b ** 2 + d ** 2 + e ** 2 >= 1 + (a * e - b * d) ** 2
    );
    const [c, f] = Array.from({ length: 2 }, random1Minus1);
    return new Matrix3(a, b, c, d, e, f, 0, 0, 1);
  }

  function reverseUV(point) {
    return point.divide(ratio).addScalar(1).multiplyScalar(0.5).multiply(resolution).round();
  }
  function mirrorAcrossX(point) {
    point.y *= -1;
  }

  function mirrorAcrossY(point) {
    point.x *= -1;
  }

  function createRotationalSymmetries(count) {
    const mat = new Matrix3().makeRotation((Math.PI * 2) / count);
    const rotate = point => point.applyMatrix3(mat);
    return Array.from({ length: count }).fill(rotate);
  }
</script>
The paper also discusses Dihedral symmetries, which are a composition of rotations and mirroring across the x axis. I won't talk about this here because it is very similar to what we have discussed so far.
Chaotic Palettes
So far we have been treating fractal flames as a binary problem, every pixel that is reached is white, other are black. However, there is a big information loss here, for example, how many times are we hitting each pixel? and which IFS / variation hit it more often? and which one last?
All of the topics we are going to cover in this section are pieces of what is broadly defined as Tone mapping.
Histograms & Densities
We better start counting before the questions go out of control. We can create an array of zeros that represents all hit-counts for every pixel, and then increment the right index for every hit.
// we use a flat array for all pixels.
const histogram = Array.from({ length: width * height }).fill(0);

// in your chaos game
for (;;) {
  // do transformations
  const { x, y } = reverseUV(point);
  const flatIdx = y * width + x;
  histogram[flatIdx]++;
  // don't render the pixel yet
}
Ok, now what?
We can scale the brightness of each pixel depending on how many times it has been hit relative to the maximum.
Of course, you can find the maximum of the histogram with a loop or a reduce. But since we are already computing the values in the chaos game, we can just update the intermediate max at every iteration:
let maxHits = 0;
for (;;) {
  // ...
  maxHits = Math.max(maxHits, ++histogram[flatIdx]);
}
Now to render the pixels, we can set the fill style of our canvas context accordingly. Since our canvas has a black background, changing the brightness is equivalent to changing opacity of the rendered pixel.
for (let i = 0; i < histogram.length; i++) {
  const brightness = histogram[i] / maxHits;
  const x = i % width;
  const y = (i - x) / width;
  ctx.fillStyle = `rgba(255, 255, 255, ${brightness})`;
  ctx.fillRect(x, y, 1, 1);
}
Note that we are not rendering every time we hit a point, but we are rendering once at the end, this a bit better because it is a fixed cost operation we can predict (More on how to optimize this later.)
And if we run this code, we get this:
Ok wow, this is disappointing. We can barely see anything.
While surprising, this is totally ok, the reason is that certain pixels get hit a lot more often than the rest of the image, resulting in a high dynamic range, skewing the distribution immensely, and shifting the average brightness of the image down.
To counteract this, we use log-density display, by logarithmically scaling the brightness ratio:
const brightness = Math.log10(histogram[i]) / Math.log10(maxHits);
In this example, I am using log base 10, which means we have to hit a pixel 10x times more often to have 2x the brightness. You can choose any log base you want, play around with it, and check out the change of base formula if you want to try a base that JavaScript does not natively support.
A lot better, we are starting to see something organic emerging.
Remember that , regardless which base you are using, is , which can ruin your computation.
Gamma scaling
The concept of Gamma correction has a very interesting history, it combines physics, human perception, photography, and video. The main idea is that is that old CRT screens were not linear when it come to luminance, but exponential, which correlates inversely with how we humans perceive brightness, or to be more precise, lightness. You can read more about it in Charles's book, Chapter 27.
Our eyes are more sensitive to variations in darker colors than in bright ones. This sensitivity allows our visual system to function across a wide range of luminance, helping us deal with the extreme brightness levels we often find around us, i.e. the sun.
A typical value for CRT screens was around 2.4, meaning if you were to display an image on a CRT, you would need to scale its brightness by the inverse of 2.4. While modern LCD screens don't suffer this issue, most calculations in computer graphics don't take the into account how the human visual system handles luminance. In code, we just need to raise the brightness to the power of inverse gamma.
const gamma = 4;
const brightness = (Math.log(histogram[i]) / Math.log(maxHits)) ** (1 / gamma);
Moreover, also can be an aesthetic choice, you can play around with the value until you get something you are pleased with. From my own experiments I found that the best value is highly dependant on the fractal itself, but values between 1.3 and 5 generally work ok. Below that it is barely noticeable, and above that you might as well just color everything white.
Source code for the figures above
<!doctype html>
<canvas id="canvas" width="800" height="500" style="background: black"></canvas>
<script src="https://cdnjs.cloudflare.com/ajax/libs/seedrandom/3.0.5/seedrandom.min.js"></script>
<script type="module">
  import { Vector2, Matrix3 } from 'https://cdn.jsdelivr.net/npm/three@0.176.0/+esm';

  const rand = new Math.seedrandom('hello!');

  const ctx = canvas.getContext('2d');
  ctx.fillStyle = 'white';

  const allVariations = [
    function sinusoidal(point) {
      point.x = Math.sin(point.x);
      point.y = Math.sin(point.y);
    },
    function hyperbolic(point) {
      const r = point.length();
      const t = Math.atan2(point.x, point.y);
      point.set(Math.sin(t) / r, r * Math.cos(t));
    },
    function eyefish(point) {
      point.multiplyScalar(2 / (point.length() + 1));
    },
  ];

  const { width, height } = canvas;
  const resolution = new Vector2(canvas.width, canvas.height);

  let ratio,
    mode = 'contain';
  if (mode === 'fill') ratio = new Vector2(1, 1);
  else if (mode === 'contain') ratio = resolution.clone().divideScalar(Math.min(canvas.width, canvas.height));
  else if (mode === 'cover') ratio = resolution.clone().divideScalar(Math.max(canvas.width, canvas.height));

  const ifs = Array.from({ length: 5 }, generateMatrix);
  const variations = Array.from({ length: ifs.length }, () => allVariations[Math.floor(rand() * allVariations.length)]);
  const symmetries = [
    v => {}, // identity
    // mirrorAcrossX,
    // mirrorAcrossY,
    // mirrorAcrossX,
    ...createRotationalSymmetries(4),
  ];

  const histogram = Array.from({ length: width * height }).fill(0);
  const point = new Vector2(Math.random(), Math.random());
  let maxHits = 0;
  for (let i = 0; i < 5000000; i++) {
    const randIdx = Math.floor(Math.random() * ifs.length);
    point.applyMatrix3(ifs[randIdx]);
    variations[randIdx](point);
    for (const symmetry of symmetries) {
      symmetry(point);
      const { x, y } = reverseUV(point.clone());
      if (x < 0 || x >= width || y < 0 || y >= height) continue;
      const flatIdx = y * width + x;
      maxHits = Math.max(maxHits, ++histogram[flatIdx]);
    }
  }
  console.log(maxHits);
  const gamma = 1.5;
  for (let i = 0; i < histogram.length; i++) {
    if (histogram[i] === 0) continue;
    // linear mapping:
    // const brightness = histogram[i] / maxHits;
    // log density:
    // const brightness = Math.log2(histogram[i]) / Math.log2(maxHits);
    // log density + gamma correction
    const brightness = (Math.log2(histogram[i]) / Math.log2(maxHits)) ** (1 / gamma);
    const x = i % width;
    const y = (i - x) / width;
    ctx.fillStyle = `rgba(255, 255, 255, ${brightness})`;
    ctx.fillRect(x, y, 1, 1);
  }

  function random1Minus1() {
    return rand() * 2 - 1;
  }

  function generateMatrix() {
    let a, b, d, e;
    do {
      [a, b, d, e] = Array.from({ length: 4 }, random1Minus1);
    } while (
      a ** 2 + d ** 2 >= 1 ||
      b ** 2 + e ** 2 >= 1 ||
      a ** 2 + b ** 2 + d ** 2 + e ** 2 >= 1 + (a * e - b * d) ** 2
    );
    const [c, f] = Array.from({ length: 2 }, random1Minus1);
    return new Matrix3(a, b, c, d, e, f, 0, 0, 1);
  }

  function reverseUV(point) {
    return point.divide(ratio).addScalar(1).multiplyScalar(0.5).multiply(resolution).round();
  }
  function mirrorAcrossX(point) {
    point.y *= -1;
  }

  function mirrorAcrossY(point) {
    point.x *= -1;
  }

  function createRotationalSymmetries(count) {
    const mat = new Matrix3().makeRotation((Math.PI * 2) / count);
    const rotate = point => point.applyMatrix3(mat);
    return Array.from({ length: count }).fill(rotate);
  }
</script>
Nice, you can see the image is brighter, with some details more visible. Again, maybe you prefer the more darker version, that is ok!
Let There Be Color
For now our coloring is different shades of gray, 256 to be precise (take that E. L. James!) but we can make this more exciting. An easy option would be colored monochrome. Maybe choose your favorite color? or generate a new random color every time?
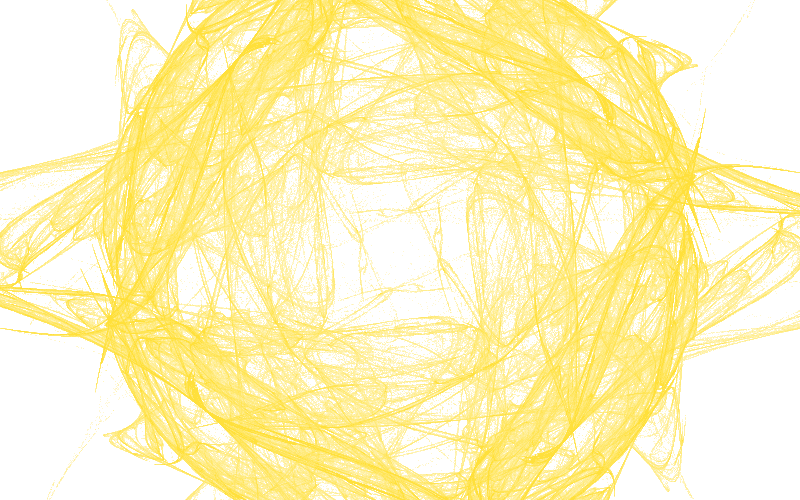
If you use a random color per pixel, you will get TV static!
Usually when rendering fractals flames, one would define a color palette, which can be just an array of colors that you index into, or it could be a function that given a numeric input, it outputs a color. This is what we have been doing so far: The input is the hit-count for that pixel, and the output is different shades of a specific color, from black to that color.
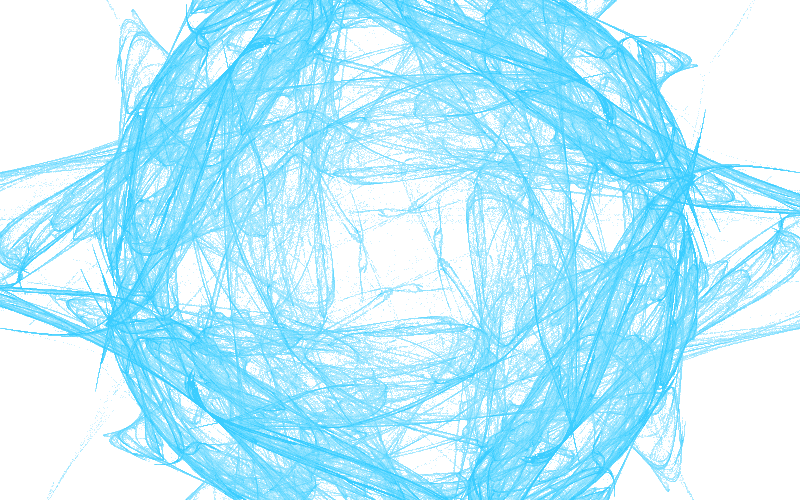
What about interpolating two different colors?
const [r, g, b] = [
  // interpolate the gold and blue from previous examples
  lerp(255, 0, brightness),
  lerp(215, 191, brightness),
  lerp(0, 255, brightness),
];
ctx.fillStyle = `rgb(${r}, ${g}, ${b})`;
or if you want in the other direction, use 1 - brightness
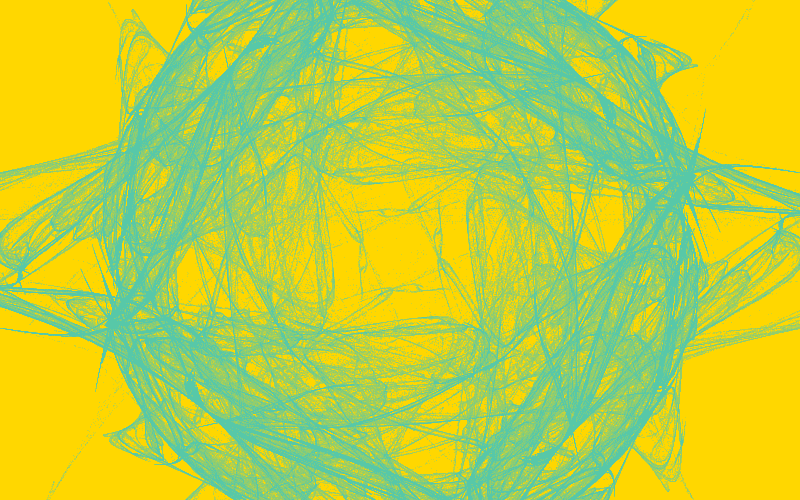
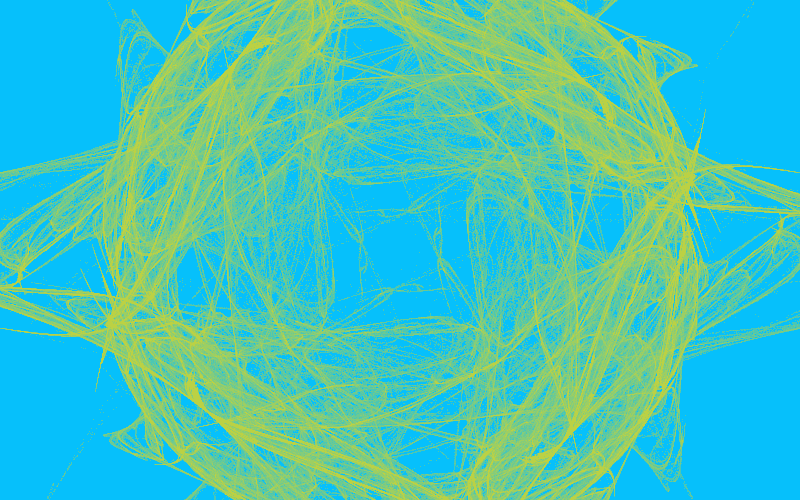
But I personally prefer the black background, it gives the flame an aura of mystery, and provides sufficient contrast to discern the details.
Defining the color palette as a function gives you most flexibility. In the following example, I am using the number of hits on a pixel, but you can also use the log of that number, the log ratio, the x or y of the pixel, time if you dare animate this, and anything else that comes to mind.
function toColor(hits: number) {
  return [
    ((1.0 - Math.cos(hits * 0.01)) / 2.0) * 255,
    ((1.0 - Math.cos(hits * 0.07)) / 2.0) * 255,
    ((1.0 - Math.cos(hits * 0.1)) / 2.0) * 255,
  ];
}
IFS Dependant Coloring
The original paper and many other implementations of these flames assign a unique color per IFS, we can easily achieve this by creating the colors on initialization.
// each color is a tuple of RGB values
const colors = Array.from({ length: ifs.length }, () => [rand(), rand(), rand()]);
I am omitting the multiplication by 255 for the sake of brevity. We can start with a simple approach and just track the last IFS to hit the pixel
const lastHits = Array.from({ length: histogram.length }).fill(-1);
// ....

for (;;) {
  // inside your chaos game
  lastHits[flatIdx] = ifsIndex; // index of the IFS you have random chosen
}
And then apply that color when rendering
const [r, g, b] = lastHits[i] === -1 ? [0, 0, 0] : colors[lastHits[i]];
ctx.fillStyle = `rgba(${r}, ${g}, ${b}, ${brightness})`;
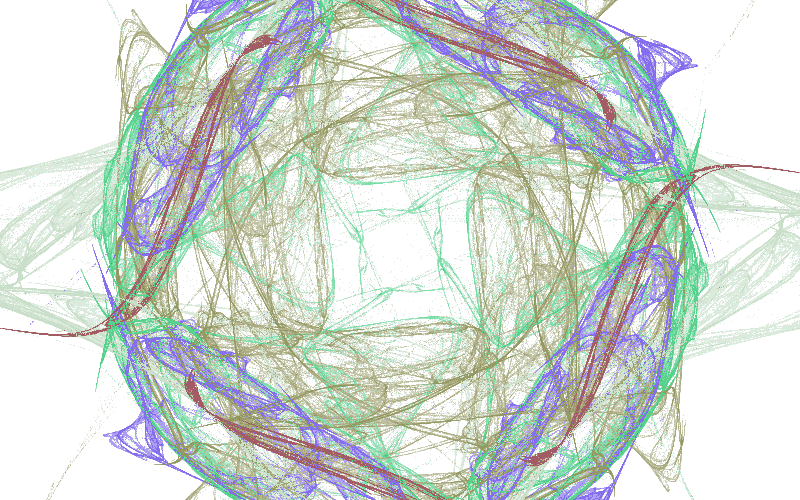
Not bad eh? we still have the problem that the colors are noisy and don't blend well, but we can fix this.
Instead of keeping only the last color, we should average out all colors weighted by how many times each IFS hit that pixel. We can achieve this with, you guessed it, another array.
const colorSum = Array.from({ length: histogram.length }, () => [0, 0, 0]);
// ....

for (;;) {
  // inside your chaos game
  colorSum[flatIdx][0] += colors[ifsIndex][0];
  colorSum[flatIdx][1] += colors[ifsIndex][1];
  colorSum[flatIdx][2] += colors[ifsIndex][2];
}

// when rendering
const numHits = histogram[i];
const [r, g, b] = colorSum[i];
ctx.fillStyle = `rgba(${r / numHits}, ${g / numHits}, ${b / numHits}, ${brightness})`;
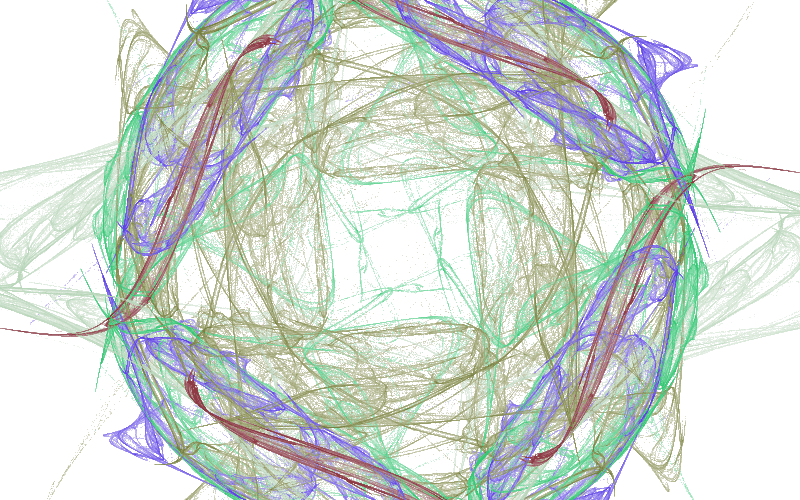
A lot less noise, great! we are almost ready.
Color Spaces
Generating random colors gives us no guarantees on the vibrance of the color output. It is totally possible to have a black or very dark color that won't be visible in the last image, and brings the brightness down. We can improve this by defining a lower bound on the generated color:
function generateColor() {
  let r, g, b;
  do {
    [r, g, b] = Array.from({ length: 3 }, rand);
  } while (Math.max(r, g, b) < 0.5); // keep generating until "contrasty" enough

  return [r, g, b];
}
The above example might guarantee that you don't get black, it but it does not speak anything about the lightness. Human perception is different per color; a full blue #0000ff is less bright than a full green #00ff00 to your eyes. We can use Relative Luminance in the computation to account for the perceived lightness.
0.2126 * r + 0.7125 * g + 0.0722 * b < 0.5; // or any other value you want
This might be a better condition to ensure consistent lightness. Of course, by definition, your sampling won't be uniform, you are more likely to have more green because it is weighted more heavily.
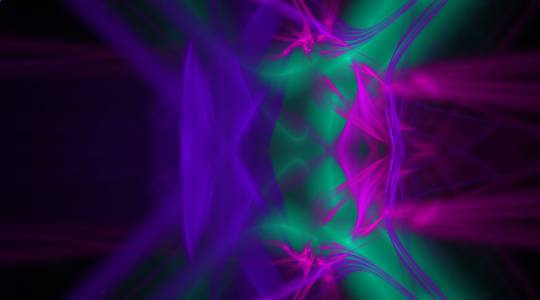
Another option is sampling from a different color space entirely. The HSL Color space (and its sibling HSV) allows you to control saturation and lightness, making it easier to choose poppy and bright colors.
function generateColor() {
  const hue = rand() * 360;
  const { r, g, b } = new Color(`hsl(${hue}, 100%, 50%)`);
  return [r, g, b];
}
This is not so easy to achieve with RGB, but also, the code above is not capable of generating any white or gray colors.
I am happy with this visualization, it feels natural, it blends smoothly into the background as if we are in space.
Worth noting is that HSL and HSV are cylindrical representation of the RGB cube, So a uniform sampling from the HSV space is a biased sampling from RGB. This manifests in practice with darker colors. There are also special color spaces specifically made for perceptual uniformity.
All or Nothing?
So far we have been computing all iterations of the chaos game in one go, and the showing it to the user. With 5M iterations, this take roughly 5 seconds on my laptop. These are 5 seconds where the user sees nothing, which is not the most pleasant experience.
We can divide our work into chunks, and after every chunk we can render the current state of the flame. Yes, the results won't be that pretty, but we can see how the flame is born!
Luckliy, the browser has many APIs that helps us achieve this, mainly requestAnimationFrame, which executes a callback after each frame has finished rendering.
If we keep our compute within a single frame, then we can see the fractal emerge in real time. We can simply reduce the number of iterations we have in the loop, but wrap the entire logic in a callback.
function frame() {
  // do the chaos game with reduced iterations
  // ...
  // do the rendering
  // ....
  // go to next frame
  requestAnimationFrame(frame);
}
requestAnimationFrame(frame);
This has the nice benefit that your fractals will keep on computing! As long as the tab is open, you will get more detailed flame. Your users might not be happy tho, because you are burning their CPU.
Full source code example
<!doctype html>
<canvas id="canvas" width="800" height="500" style="background: black"></canvas>
<script src="https://cdnjs.cloudflare.com/ajax/libs/seedrandom/3.0.5/seedrandom.min.js"></script>
<script type="module">
  import { Vector2, Matrix3, MathUtils, Color } from 'https://cdn.jsdelivr.net/npm/three@0.176.0/+esm';

const rand = new Math.seedrandom('hello!');

const ctx = canvas.getContext('2d');
ctx.fillStyle = 'white';

const allVariations = [
function sinusoidal(point) {
point.x = Math.sin(point.x);
point.y = Math.sin(point.y);
},
function hyperbolic(point) {
const r = point.length();
const t = Math.atan2(point.x, point.y);
point.set(Math.sin(t) / r, r * Math.cos(t));
},
function eyefish(point) {
point.multiplyScalar(2 / (point.length() + 1));
},
];

const { width, height } = canvas;
const resolution = new Vector2(canvas.width, canvas.height);

let ratio,
mode = 'contain';
if (mode === 'fill') ratio = new Vector2(1, 1);
else if (mode === 'contain') ratio = resolution.clone().divideScalar(Math.min(canvas.width, canvas.height));
else if (mode === 'cover') ratio = resolution.clone().divideScalar(Math.max(canvas.width, canvas.height));

const ifs = Array.from({ length: 5 }, generateMatrix);
const variations = Array.from({ length: ifs.length }, () => allVariations[Math.floor(rand() * allVariations.length)]);
const colors = Array.from({ length: ifs.length }, generateColor);
const symmetries = [
v => {}, // identity
// mirrorAcrossX,
// mirrorAcrossY,
// mirrorAcrossX,
...createRotationalSymmetries(4),
];

const histogram = Array.from({ length: width \* height }).fill(0);
const colorSum = Array.from({ length: histogram.length }, () => [0, 0, 0]);

function frame() {
const point = new Vector2(Math.random(), Math.random());
let maxHits = 0;
for (let i = 0; i < 50_000; i++) {
// take and apply random IFS
const randIdx = Math.floor(Math.random() \* ifs.length);
point.applyMatrix3(ifs[randIdx]);
variations[randIdx](point);

      for (const symmetry of symmetries) {
        // apply symmetries
        symmetry(point);
        // compute position on screen
        const { x, y } = reverseUV(point.clone());
        if (x < 0 || x >= width || y < 0 || y >= height) continue;
        const flatIdx = y * width + x;
        // update hits
        maxHits = Math.max(maxHits, ++histogram[flatIdx]);
        // accumulate colors
        colorSum[flatIdx][0] += colors[randIdx][0];
        colorSum[flatIdx][1] += colors[randIdx][1];
        colorSum[flatIdx][2] += colors[randIdx][2];
      }
    }

    const gamma = 1.5;
    for (let i = 0; i < histogram.length; i++) {
      if (histogram[i] === 0) continue;
      // log density + gamma correction
      const logRatio = Math.log10(Math.max(histogram[i], 1)) / Math.log10(maxHits);
      const brightness = logRatio ** (1 / gamma);
      const numHits = histogram[i];
      const [r, g, b] = colorSum[i];
      // use avg of accumulated color
      ctx.fillStyle = `rgba(${(r / numHits) * brightness}, ${(g / numHits) * brightness}, ${(b / numHits) * brightness}, ${logRatio})`;
      const x = i % width;
      const y = (i - x) / width;
      ctx.fillRect(x, y, 1, 1);
    }

    requestAnimationFrame(frame);

}
requestAnimationFrame(frame);

function random1Minus1() {
return rand() \* 2 - 1;
}

function generateMatrix() {
let a, b, d, e;
do {
[a, b, d, e] = Array.from({ length: 4 }, random1Minus1);
} while (
a ** 2 + d ** 2 >= 1 ||
b ** 2 + e ** 2 >= 1 ||
a ** 2 + b ** 2 + d ** 2 + e ** 2 >= 1 + (a _ e - b _ d) \*\* 2
);
const [c, f] = Array.from({ length: 2 }, random1Minus1);
return new Matrix3(a, b, c, d, e, f, 0, 0, 1);
}

function reverseUV(point) {
return point.divide(ratio).addScalar(1).multiplyScalar(0.5).multiply(resolution).round();
}
function mirrorAcrossX(point) {
point.y \*= -1;
}

function mirrorAcrossY(point) {
point.x \*= -1;
}

function createRotationalSymmetries(count) {
const mat = new Matrix3().makeRotation((Math.PI \* 2) / count);
const rotate = point => point.applyMatrix3(mat);
return Array.from({ length: count }).fill(rotate);
}

function generateColor() {
const hue = rand() _ 360;
const { r, g, b } = new Color(`hsl(${hue}, 100%, 50%)`);
return [r _ 255, g _ 255, b _ 255];
}

</script>
Take the code from the last example and fiddle with the parameters, changing the seed by itself will gave vastly different outputs, number of IFS / variations as well. The number of iterations affects the noise and brightness in the image, the more the better, with the cost of more compute time.
In the next section, we are going to start to think about performance.
Optimizing Chaos
Computing flames is an inherently expensive operation, playing the chaos game requires many, many, sequential iterations to converge towards the final fractal, furthermore, to render the fractal, you have to loop over all of the pixels in the image to compute the final colors.
Rendering in real time meaning we would need to come as close as we can to the screen refresh rate, which is typically 60 fps, with higher values for some modern devices, all while not blocking the main browser thread.
In the article Response Times: The 3 Important Limits by Jakob Nielson. he discusses research done on the human perception of responsive of applications, which can be summarized in three points:
- 100ms is instantaneous
- 1s the user loses flow of thought
- 10s the user loses attention
The 100ms is our critical threshold, 10fps or below means you have lost the game. Let's start by the simplest low hanging fruit.
Use Canvas, But Not Really
Canvas has a friendly API for drawing shapes on the screen, it is designed to be easy to get started, and it is! at the cost of performance.
We are rendering each pixel using fillRect which under the hood issues a GPU draw call. As the name suggest, it sends the requested commands to the GPU for rendering.
Going back and forth to the GPU is not particularly efficient, and we are doing this for every pixel on the screen. Modern browsers will accumulate some commands and execute them in batches, but we can be a lot more smarter by sending all the pixels all at once.
We can achieve this using putImageData with an ImageData object.
const pixels = new ImageData(width, height);

// in the rendering
for (let i = 0; i < histogram.length; i++) {
  const numHits = histogram[i];
  const logRatio = Math.log10(numHits) / Math.log10(maxHits);
  const brightness = logRatio ** (1 / gamma) / numHits;

  const idx = i * 4;
  pixels.data[idx + 0] = colorSum[i][0] * brightness;
  pixels.data[idx + 1] = colorSum[i][1] * brightness;
  pixels.data[idx + 2] = colorSum[i][2] * brightness;
  pixels.data[idx + 3] = logRatio * 255;
}

ctx.putImageData(pixels, 0, 0);
This brings down the time to render the image from ~730ms to ~30ms on my laptop, using a 800 by 500 canvas.
Cache friendliness
Modern CPUs have a small amount of very fast memory called the cache. Any computation requires fetching the data to the cache first, which is a relatively expensive operation. The data stays in the cache for further processing if needed, and then removed in case new data has to be fetched.
CPU caches are a bigger topic with a scope that vastly exceed the scope of this post. I highly recommend this old but still awesome presentation by Scott Meyers on the topic.
But in summary, to have good performance you need to keep your data small and compact, and you need to access it in a predictable pattern. How compact, you say? On my laptop with an Intel i7-7700HQ the total amount of cache is 6 MB. As a reference, a single 1080p image is around 8MB.
Unfortunately, Javascript by default does not help us in this case, since arrays usually contain pointers to other locations in memory that would need to be fetched to the cache to get the real value, slowing everything down. (V8 optimizes integer arrays tho, which is good). Luckily, JavaScript has Typed Arrays, which are contiguous blocks of memory for working with numbers. This is more cache friendly since the data is stored directly in the array and avoids the indirection.
So we need to make our data as compact as possible. Right now we have two array, one for the number of hits, and one for colors, we can use one typed array for both.
const data = new Uint32Array(width * height * 4); // 3 for r, g, b, and 1 for the hit count

// in your chaos game
for (;;) {
  // ...
  const flatIdx = (y * width + x) * 4;
  data[flatIdx + 0] += color[0];
  data[flatIdx + 1] += color[1];
  data[flatIdx + 2] += color[2];
  data[flatIdx + 3] += 1;
}

// tone mapping
for (let i = 0; i < data.length; i += 4) {
  const numHits = data[i + 3];
  const logRatio = Math.log10(numHits) / Math.log10(maxHits);
  const brightness = logRatio ** (1 / gamma) / numHits;

  pixels.data[i + 0] = data[i + 0] * brightness;
  pixels.data[i + 1] = data[i + 1] * brightness;
  pixels.data[i + 2] = data[i + 2] * brightness;
  pixels.data[i + 3] = logRatio * 255;
}
This is already more compact memory-wise and cache friendly, and the read patterns in the rendering are very predictable. Unfortunately, the writing to the buffer is still very inefficient, an inherit problem in the unpredictability of the chaos game. We are constantly jumping after every iteration to a pixel in a different location and thrashing our cache.
A note about Uint32Array vs Float32Array
Why have I chosen to go with a Uint32Array for my data instead of Float32Array? can't we store the same data in a float array and in theory it should be able to store even wider range of values?
Yes, and no. Floats are not integers. You can try to run this code in your browser and observe the behavior
const arr = new Float32Array(1); // array with one element
for (let i = 0; ; i++) {
  arr[0] = i;
  if (arr[0] !== i) throw new Error(`Expected ${i}, found ${arr[0]}`);
}
Or a one liner you can run in node
node -e 'for (let i=0,arr=new Float32Array(1);;arr[0]=++i) if(arr[0] !== i) throw new Error(`Expected ${i}, found ${arr[0]}`)'
In our case, we are counting hits, and our colors are integers, so Uint32Array make sense.
Also, using typed arrays is already a step forward for the next optimization.
Not Blocking the Main Thread
One of the golden performance rules when building websites is to not block the main thread. JavaScript is single threaded, all of your JS code, UI updates, and event handlers run on the main (and only) thread. If you block it by computing flame fractals, it means the user cannot interact with the page until the computation is finished.
Since we are computing all the time, offloading this to a Web Worker would help significantly. Web Workers can be thought of as a separate execution threads, they run completely isolated from the main one, with their own event loop, and communication to the "outside" world is limited to message passing.
If you are doing anything in a Worker, Comlink should be your go to solution. It wraps all of the messaging complexity in a nice, typed, async API. Basically gRPC, but a lot less annoying.
For our use case, we move all of the code related to computation to a worker:
import { expose } from "Comlink";

export type Computer = {
  async init(args: { width: number, height: number, seed: string }): Promise<void>
  async iteration(): Promise<Uint32Array>
}

let data, ifs, variations, symmetries; // and all else you need

expose({
  async init({width, height, seed}){
    data = new Uint32Array(width * height * 4);
    // seed your generator, and create the functions
    ifs = ...
    variations = ....
    symmetries = ...
  },
  async iteration(){
    // play the chaos game with reduced iterations
    for(let i = 0; i < 5000; i++){
      // compute!
    }
    // Here we return a copy.
    return data;
  }
} satisfies Computer)
And then in your main thread
const worker = new Worker(new URL('./worker', import.meta.url));
const proxy = new Comlink.wrap(worker);
await proxy.init({ width, height, seed });

function frame() {
  const data = await proxy.iteration();
  // do the tone mapping with the data.
  // ...
  requestAnimationFrame(frame);
}
And voila! it is off the main thread. You can also offload the tone mapping in the same fashion to a separate worker, but you will need to send it the data.
The cost of Isolation
Moving data to workers meaning we are not blocking the main thread, but also, we made everything slower. Why you ask?
because now we are copying the data back to the main thread after every iteration, (which is not cheap) while also adding the synchronization overhead with the main thread. There is the option to transfer the buffer, which is a lot faster, but then we won't have access to it in the worker anymore, and we cannot accumulate more values in our histogram.
Is there a way we can share memory between the main thread and workers? Yes! Shared Array Buffers were designed specifically to do this. Any data you write to the buffer, will be (eventually) visible to all other threads.
Unfortunately (or not?), Shared Memory was disabled completely from browsers around 2018 due to security issues, mainly Spectre and Meltdown which abused shared memory to do timing based attacks. Later on in 2020 shared memory was enabled again with specific security requirements, the document has to be running in a Secure Context and Cross Origin Isolated. These requirements can roughly be summerized with the following
- The document (and its parents) are served over TLS (localhost works fine)
Cross-Origin-Embedder-Policyhas to be set torequire-corpCross-Origin-Opener-Policyhas to be set tosame-origin
The first one is generally a good practice, the others have real consequences on your website, mainly it cannot be used from other domains and cannot embed resources from other domains. So if you rely on these features, you have to be selective where you apply these headers.
Note for custom headers with popular frameworks
While some frameworks like Next.js allow you to set the headers, it is does not always work as you expect. Since these headers are required on the document, and most of these frameworks will do client side navigation. You might end up in situations were the headers either don't apply or apply too broadly.
Assuming you went through the hassle of setting up these requirements, you can now use SharedArrayBuffer in your code! In my case, I create two buffers on the main thread, one for the compute data, and one for the final pixels array, which are sent to the respective workers.
const dataBuffer = new SharedArrayBuffer(Uint32Array.BYTES_PER_ELEMENT * width * height * 4);
const pixelBuffer = new SharedArrayBuffer(Uint8ClampedArray.BYTES_PER_ELEMENT * width * height * 4);

// ....
await computeWorker.init({ width, height, seed, buffer: dataBuffer });
await renderingWorker.init({ width, height, buffer: pixelBuffer });
And you can create a view on this buffer in the worker:
expose({
  async init({ buffer }) {
    data = new Uint32Array(buffer);
    // ... other stuff
  },
});
Also worth mentioning that you cannot use a SharedArrayBuffer for the ImageData, in this case we have to copy. But this is easy and fast (takes less than 1ms).
imageData.data.set(new Uint8ClampedArray(pixelBuffer));
ctx.putImageData(imageData, 0, 0);
With Great Power Comes Great Responsibility
Ok great, now we are computing off the main thread, now it is time to reap the benefits of Web Workers, by having more than one of them. We are already using a SharedArrayBuffer that we can pass it around to all workers, but we need to pay attention to race conditions since multiple workers could be writing to the same pixel data.
Let's take a step back and think about a single addition:
data[index] += 1;
Under the hood, your CPU is executing something like this:
mov eax, [Address]   ; Load value from memory
add eax, 1           ; Increment
mov [Address], eax   ; Store it back to memory
After loading the value, and due to the unpredictability of multi-threading: in the time required to increment the value, and write it back, it is totally possible that a different thread (worker) has already loaded, incremented, and stored their value at the same location, which will be overwritten by the first thread.
JavaScript provides the Atomics global containing functionality that aids in concurrent reads / writes to the same memory location.
Atomics.add(data, index, 1); // no race conditions
And so we update our compute worker code
Atomics.add(data, flatIdx + 0, color[0]);
Atomics.add(data, flatIdx + 1, color[1]);
Atomics.add(data, flatIdx + 2, color[2]);
Atomics.add(data, flatIdx + 3, 1);
And now you can run as many workers you want in parallel. Make sure to use the same seed for generating the flame parameters, not for the starting point of the chaos game, otherwise all workers would end up sampling the same values.
Gotta go fast?
I did a benchmark just to see how much performance do I gain from workers, and also how much do atomics cost, I measured how much time did it take for seed=3QaB to reach 50k hits on 550x550 canvas. Here are the results:
Obviously, adding workers beyond a certain point does not make any noticeable difference. What I did not expect is that with atomics the code is 2x slower, but it makes sense if you think about it. We are sacrificing performance for correctness.
Now I am stuck with a decision: Am I going to trade years of CS studies and correctness for performance? Is the trade off worth it? What is the worse that could happen if we let the workers overwrite each other?
Assuming the worst, we have an image with only 5000 pixels with 8 workers with a uniform pixel hit distribution. How likely is it to have a collision (race condition)?
This is actually an example of the Birthday paradox hidden in plain sight, the chance of at least a single collision is computed as follows:
We are going to run many iterations of the chaos game, and so the 0.5% is not final, and I am oversimplifying the problem significantly. But I think I am willing to take the chance of having slightly incorrect output for double the performance. Your eyes won't see the difference anyway.
In practice, the means replacing the Atomics.add calls with simple addition data[idx] += value in the compute worker.
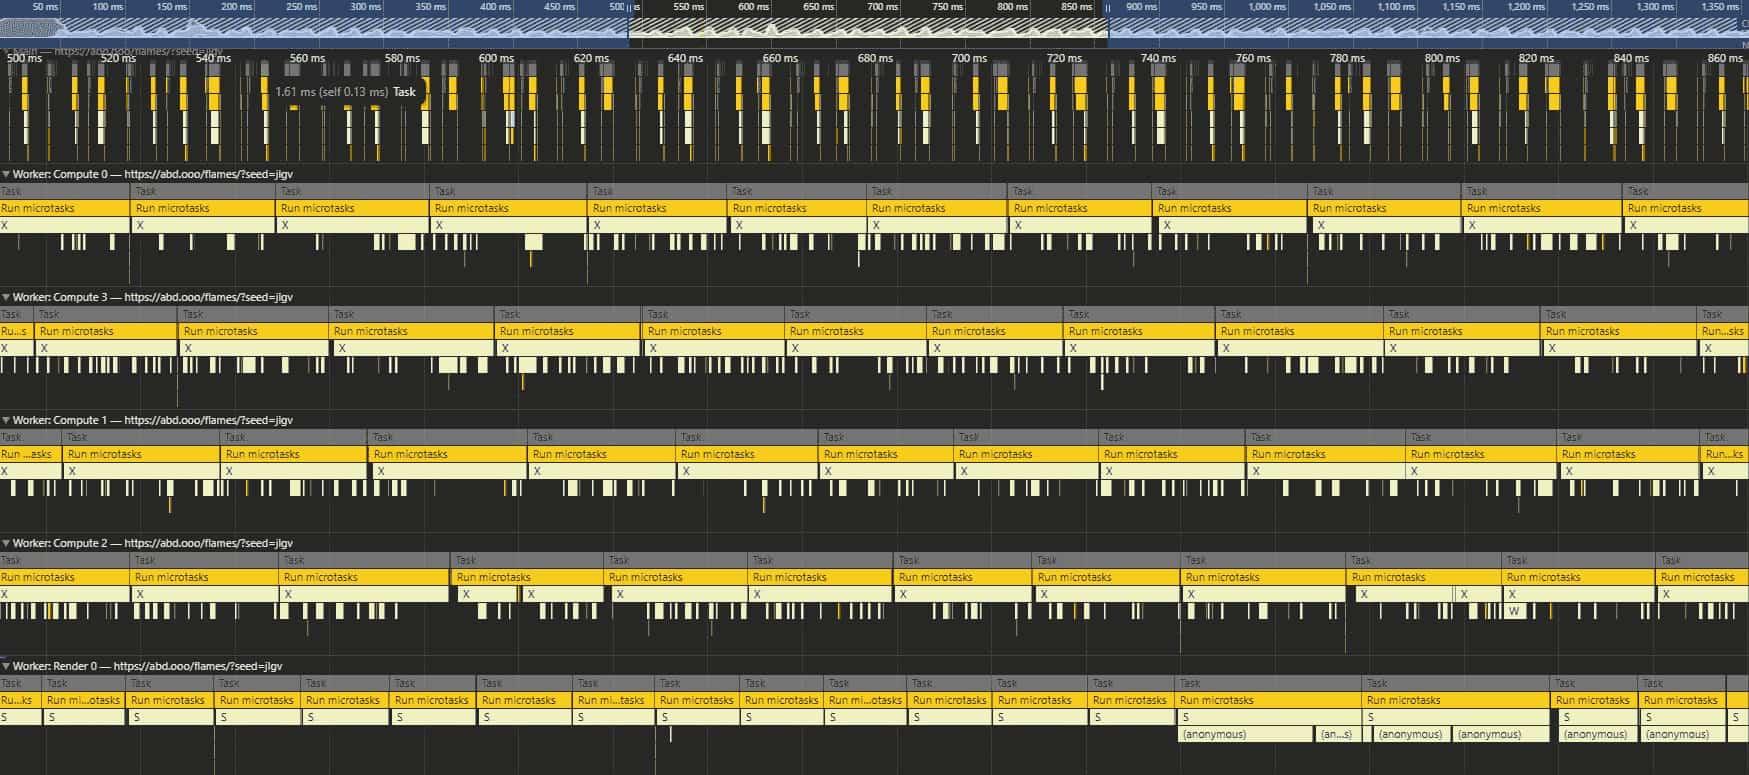
I ended up using half of the device cores for compute, using navigator.hardwareConcurrency, which allows the flame to "converge" in around 4 seconds.
Here is what you would see when you run the profiler on the page
Fake It Till You Make It
So far we have been optimizing the compute, maybe it is time to look at the tone mapping. On my laptop a single 1080p frame takes around 250ms to compute, by not a lot of code:
for (let i = 0; i < data.length; i += 4) {
  const numHits = data[i + 3];
  const logRatio = Math.log10(numHits) / Math.log10(maxHits);
  const brightness = logRatio ** (1 / gamma) / numHits;

  pixels.data[i + 0] = data[i + 0] * brightness;
  pixels.data[i + 1] = data[i + 1] * brightness;
  pixels.data[i + 2] = data[i + 2] * brightness;
  pixels.data[i + 3] = logRatio * 255;
}
We can start by pre-computing some values that don't change inside the loop, like 1 / gamma and Math.log10(maxHits), furthermore, we can completely skip rendering any pixels that we know are dark enough to be black when numHits is below a threshold like 10. These simple changes already bring the frame time down to around 180ms, and much lower on the first couple of frames since most of the image is still empty.
But still, the most expensive operations we do in this loop is the log10 and the ** exponent. We can divide the work onto multiple workers, but I don't want to waste cycles on this, I would rather use these resources to play the chaos game. You can of course reduce the resolution of your canvas, and this would be a great start, but the final image will be muddy.
So let's focus on the perception of smoothness. We can use a dumbed down version of Alternate Frame Rendering (which renders different frames by different GPUs) and do alternate pixel rendering. For example, we can tone-map all the even pixels on the first frame, and next frame all the odd ones. This cuts our tone-mapping time by half. You can take this concept further to every nth pixel.
Of course, this results in a darker image initially where some pixels that should be colored are black, but this converges very quickly after a couple of frames, and actually results in a nice "fade in" animation. I found n=5 to be the sweet spot for performance while also looking good!
Perfect Is The Enemy of Good
My flame renderer has reached a state I am satisfied with, there are other ways we can keep optimizing this code, and and I will discuss some of them in the next section, but as Leonardo da Vinci said
Art is never finished, only abandoned
Future Work
Anti Aliasing
The original paper for the fractal flame algorithm explains how one would add anti aliasing to the flame: By using a larger buffer for the histogram, and then averaging the values in the tone-mapping, we can have anti aliasing for not a lot of compute but a larger memory footprint.
This is something that I could easily tackle, and maybe I will do this soon, as long as the performance stays within what I consider acceptable.
Blur
The paper also discussed using dynamic blurring on the flame using KDE, which in simple terms means that pixels with high hit count get blurred a lot less than others, resulting in clear details for the important parts of the flame, and a more smooth look for the faded background.
I know this won't run in real time, a least not on the CPU, so I have not tried it.
Webassembly
I believe I can squeeze more performance with Webassembly, maybe compiled from Rust or similar. However, I have not managed to find a way to pass the shared array buffer from and to wasm without copying. It is possible to create wasm modules with shared memory, but it is not obvious for me how this could be used for my use-case. Perhaps the copying is not an issue and it is still faster than just compute in JS?
Tone-map on the GPU
Right now doing alternate pixel rendering to hit realtime, but there is nothing stopping us from doing this computation on the GPU as a shader.
While it is totally possible, WebGL does not support passing Uint32 buffers / textures, you would need to do ugly bit shifting into a texture that is 4x larger to be able to achieve this (with even more ugliness if you want anti aliasing). webgl2 supports RGBA32F float textures, but this requires the EXT_color_buffer_float extension, which may or may not be available on every device.
Also, now you have the cost of pushing all of the data to the GPU every frame. Again, perhaps doing all of this is faster than the current approach?
WebGPU all the way
I am very excited about the new WebGPU API, it tries to tackle all of the issues with webgl while also providing a GPGPU interface using Compute Shaders. Currently WebGPU support is limited to only Chromium browsers, which put me off of using it.
I guess maybe around 2027 WebGPU would be ready for everyone and I would comeback and rewrite EVERYTHING for the GPU. Imagine a future where you can get the whole flame, millions of iterations, in less than a second!
Conclusion
This project threw me into a very deep but surprisingly satisfying rabbit hole, and I enjoyed every moment of it. I spent a total of ~40 hours coding, and ended up with ~600 lines of code only, 200 of them are just variations. This post took ~12 hours to write, it is 1 AM now, and I should go to bed soon.
These kinds of projects are my creative outlet, and I hope you have your own avenue to express your creativity without limits, and if not, I hope you feel inspired now to go find it!


Stay curious!